PostgreSQL is a robust, open-source relational database system that’s widely used in both small and large-scale production environments. Installing and configuring PostgreSQL, especially when dealing with custom directories or network-based access, can seem complex at first. In this guide, we will walk through the process of installing PostgreSQL 17 on Ubuntu 24.04, setting up a custom $PGDATA directory, enabling network access, and configuring client authentication.
For this example, I have installed Ubuntu 24.04 on a virtual machine running on the VMware ESXi hypervisor. The operating system is installed on a dedicated 32 GB virtual hard disk, while all PostgreSQL database files will be stored on a separate 300 GB virtual hard disk, which is attached to the VM via the PVSCSI storage controller. The directory where the database files are stored is referred to as $PGDATA in a PostgreSQL installation.
Step 1: Add the PostgreSQL APT Repository
By default, the Ubuntu package repositories might not have the latest version of PostgreSQL (in this case, version 17). Therefore, the first step is to add the official PostgreSQL APT repository to your system.
Add the PostgreSQL signing key to authenticate the packages, and add the PostgreSQL repository to your sources list:
wget --quiet -O - https://www.postgresql.org/media/keys/ACCC4CF8.asc | sudo apt-key add -
sudo sh -c 'echo "deb http://apt.postgresql.org/pub/repos/apt $(lsb_release -cs)-pgdg main" > /etc/apt/sources.list.d/pgdg.list'
This ensures you’re fetching the latest PostgreSQL packages directly from the PostgreSQL Global Development Group’s repository.
Step 2: Install PostgreSQL 17
Once the repository is added, the next step is to install PostgreSQL 17 and its associated packages.
Update the package lists to reflect the new repository, and install PostgreSQL 17:
sudo apt update
sudo apt install postgresql-17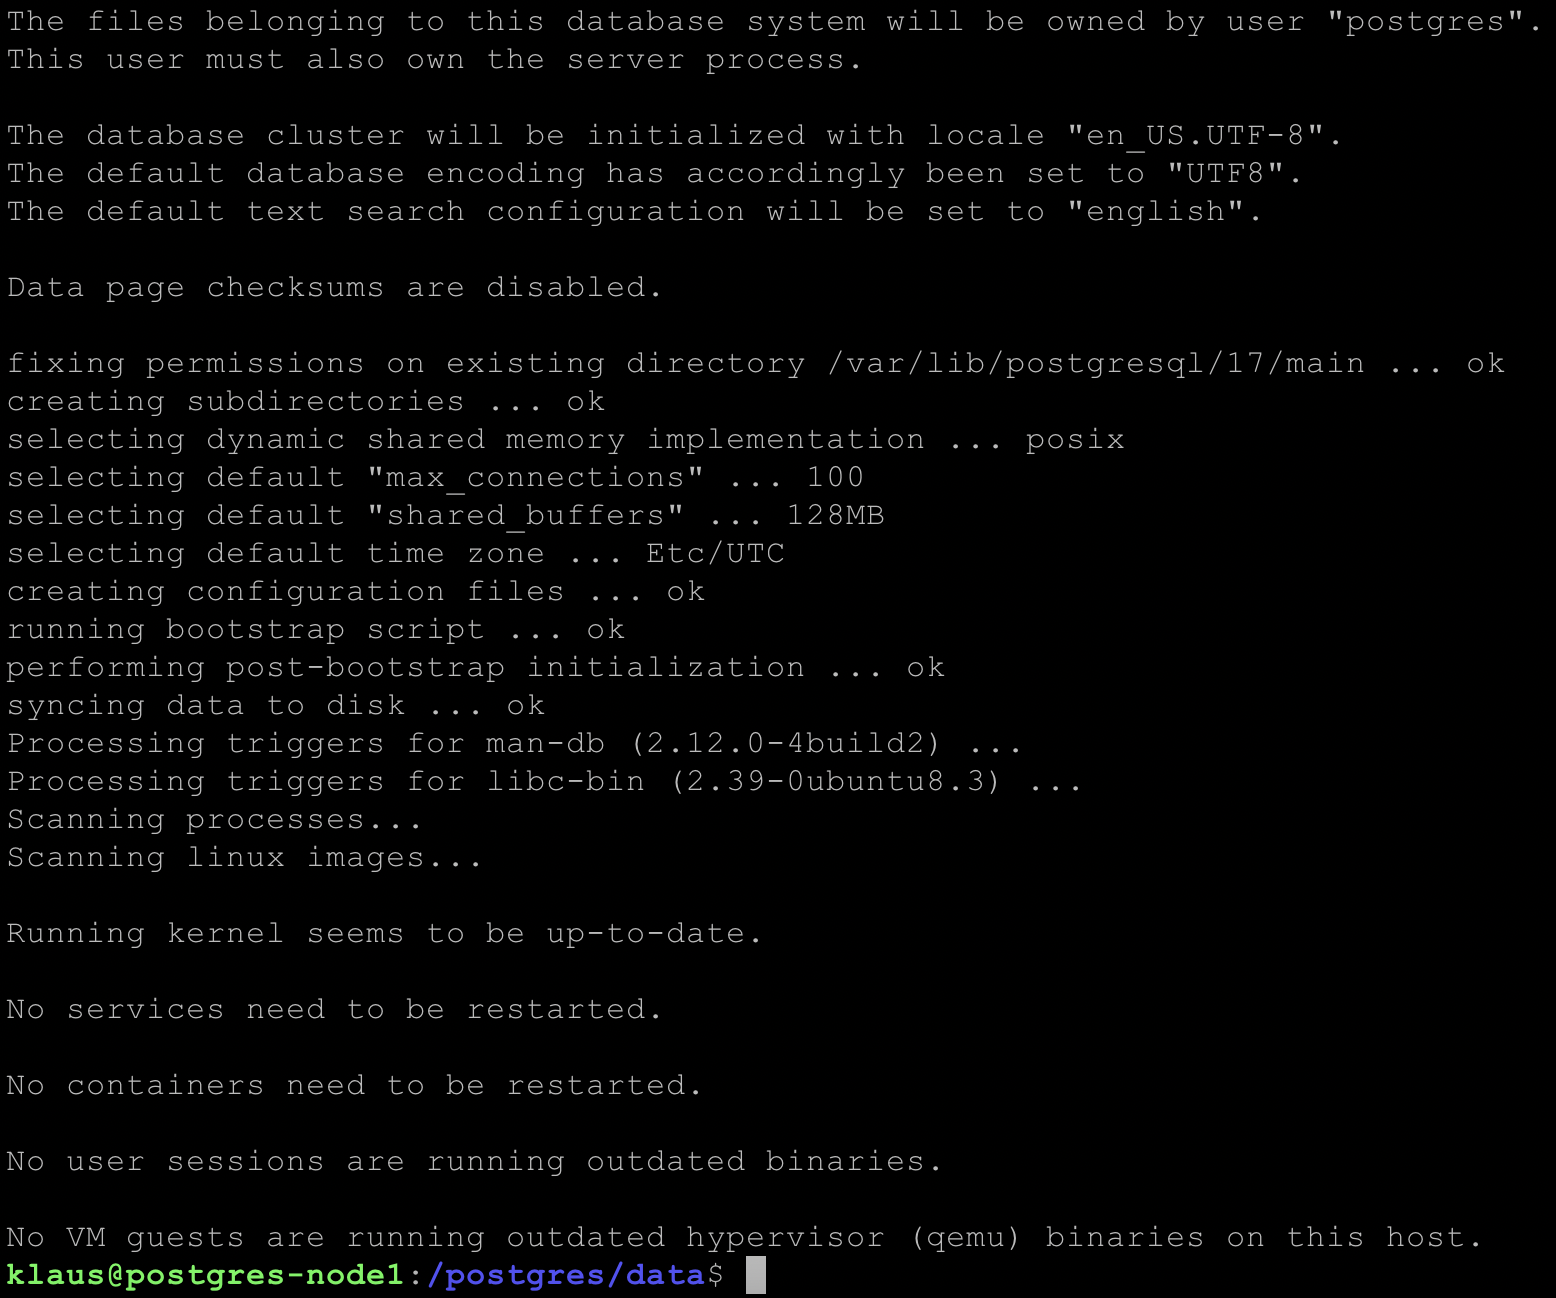
Step 3: Stop the PostgreSQL Service
Before customizing PostgreSQL’s setup (such as using a custom data directory), it’s essential to stop the PostgreSQL service.
sudo systemctl stop postgresqlThis ensures there are no running PostgreSQL processes that might interfere with the changes.
Step 4: Create a new $PGDATA Directory
PostgreSQL stores its data in the $PGDATA directory, typically located at /var/lib/postgresql/17/main. However, you can specify a custom location if necessary. For example, let’s use /postgres/pgdata. In my case, the /postgres directory serves as a mount point for the virtual hard disk located at /dev/sda and is formatted with the ext4 file system. We also set the correct permissions to ensure the postgres user has ownership:
sudo mkdir -p /postgres/pgdata
sudo chown postgres:postgres /postgres/pgdata
sudo chmod 700 /postgres/pgdata
Step 5: Initialize the new Data Directory
Now that the new $PGDATA directory is created, you need to initialize it for PostgreSQL to use.
Let’s switch to the postgres user, initialize the new data directory with the initdb command, and exit the postgres user session:
sudo su - postgres
/usr/lib/postgresql/17/bin/initdb -D /postgres/pgdata
exit
Step 6: Update the PostgreSQL Configuration
Next, you need to update PostgreSQL’s configuration so that it points to your custom $PGDATA directory. Edit the PostgreSQL configuration file located in /etc/postgresql/17/main/postgresql.conf, and ensure the data_directory setting points to your new directory:
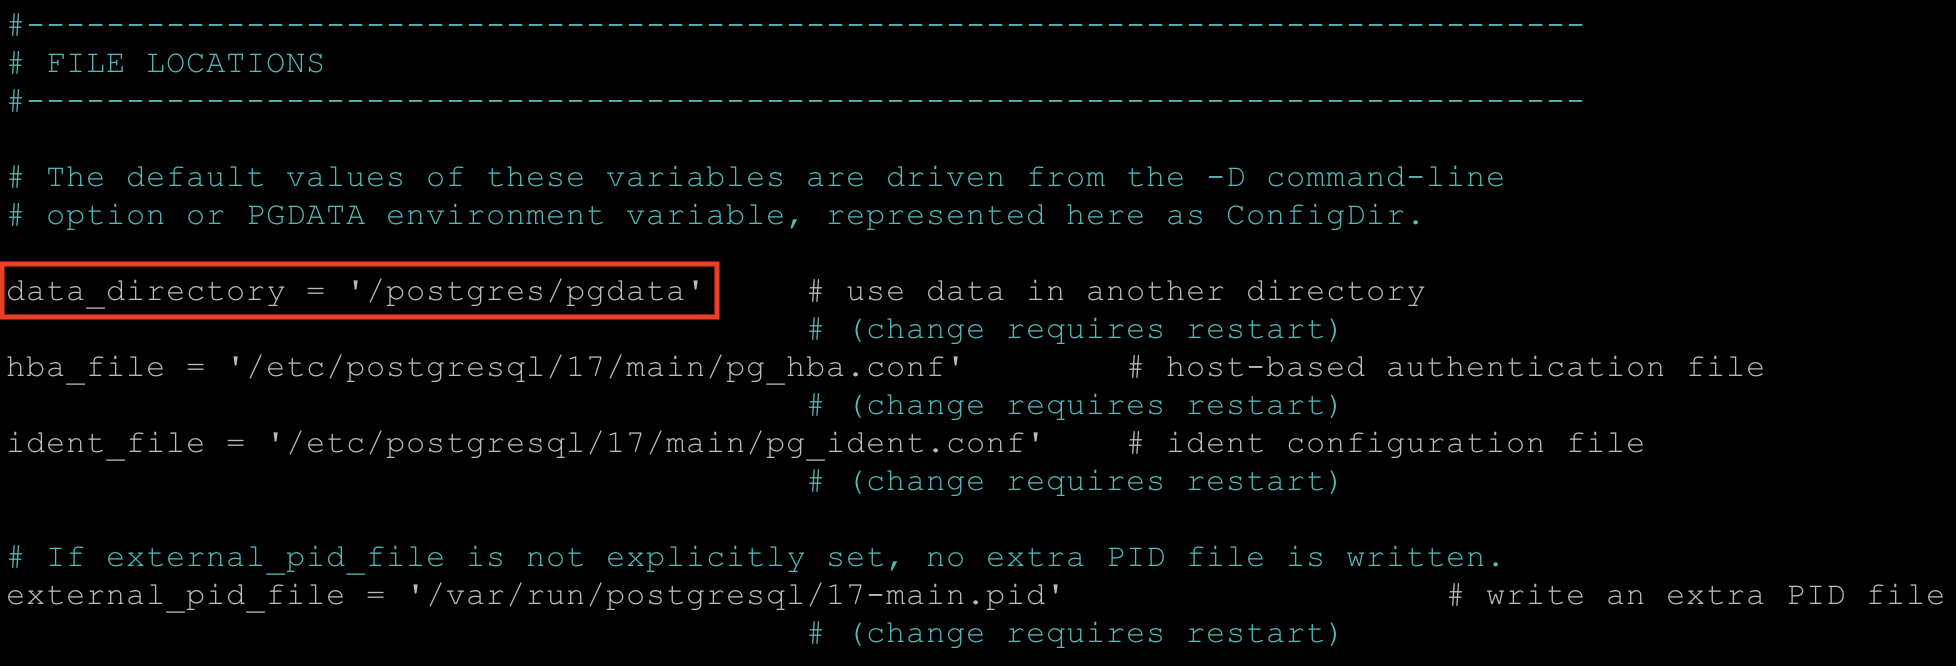
This will direct PostgreSQL to store its data in the new location rather than the default directory.
Step 7: Start the PostgreSQL Service
Now that everything is set up, restart the PostgreSQL service to apply the changes.
sudo systemctl start postgresqlStep 8: Verify PostgreSQL is Running and Using the new Data Directory
To ensure that PostgreSQL is using the new $PGDATA directory, run the following commands:
sudo systemctl status postgresql
sudo -u postgres psql -c "SHOW data_directory;"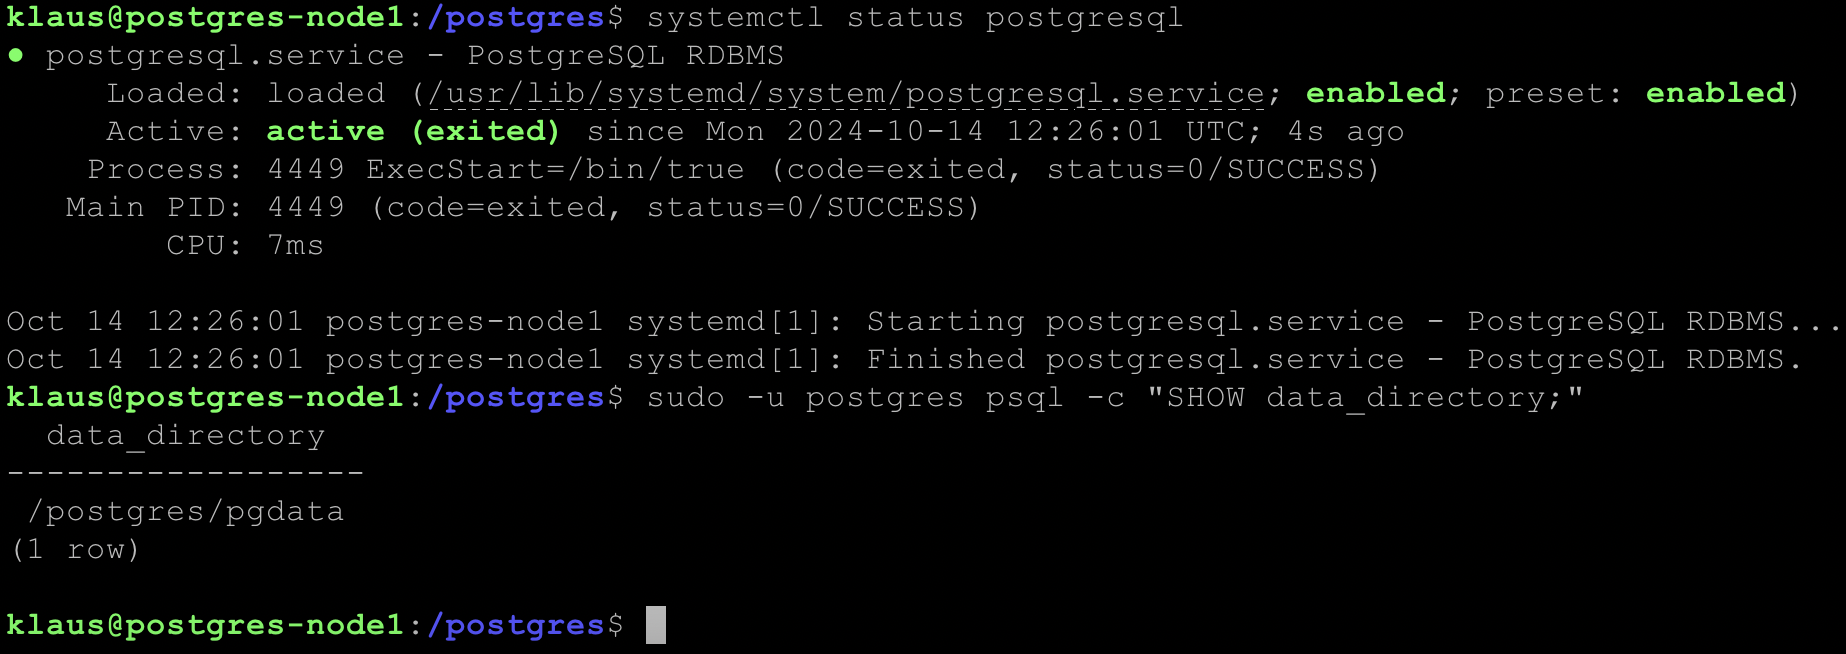
Step 9: Enable Automatic Start
To ensure that PostgreSQL starts automatically on boot, enable the PostgreSQL service:
sudo systemctl enable postgresqlStep 10: Set a Password for the postgres User
By default, PostgreSQL uses “peer authentication” for the postgres user, meaning you can only log in locally via the system’s postgres Unix account. If you need to set a password for remote access, follow these steps:
Log in to the PostgreSQL shell, and set a password for the postgres user:
sudo -u postgres psql
ALTER USER postgres PASSWORD 'passw0rd1!';
\q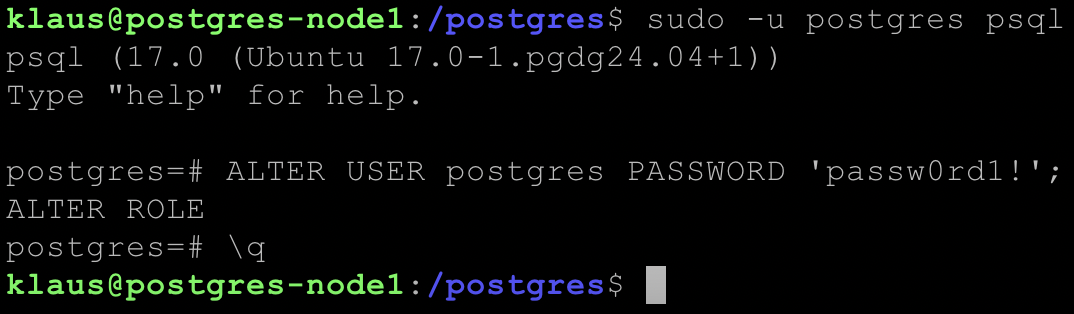
Step 11: Configure PostgreSQL to Listen on All IP Addresses
By default, PostgreSQL only listens on localhost. To allow remote connections, you need to configure PostgreSQL to listen on all network interfaces in the configuration file /etc/postgresql/17/main/postgresql.conf:
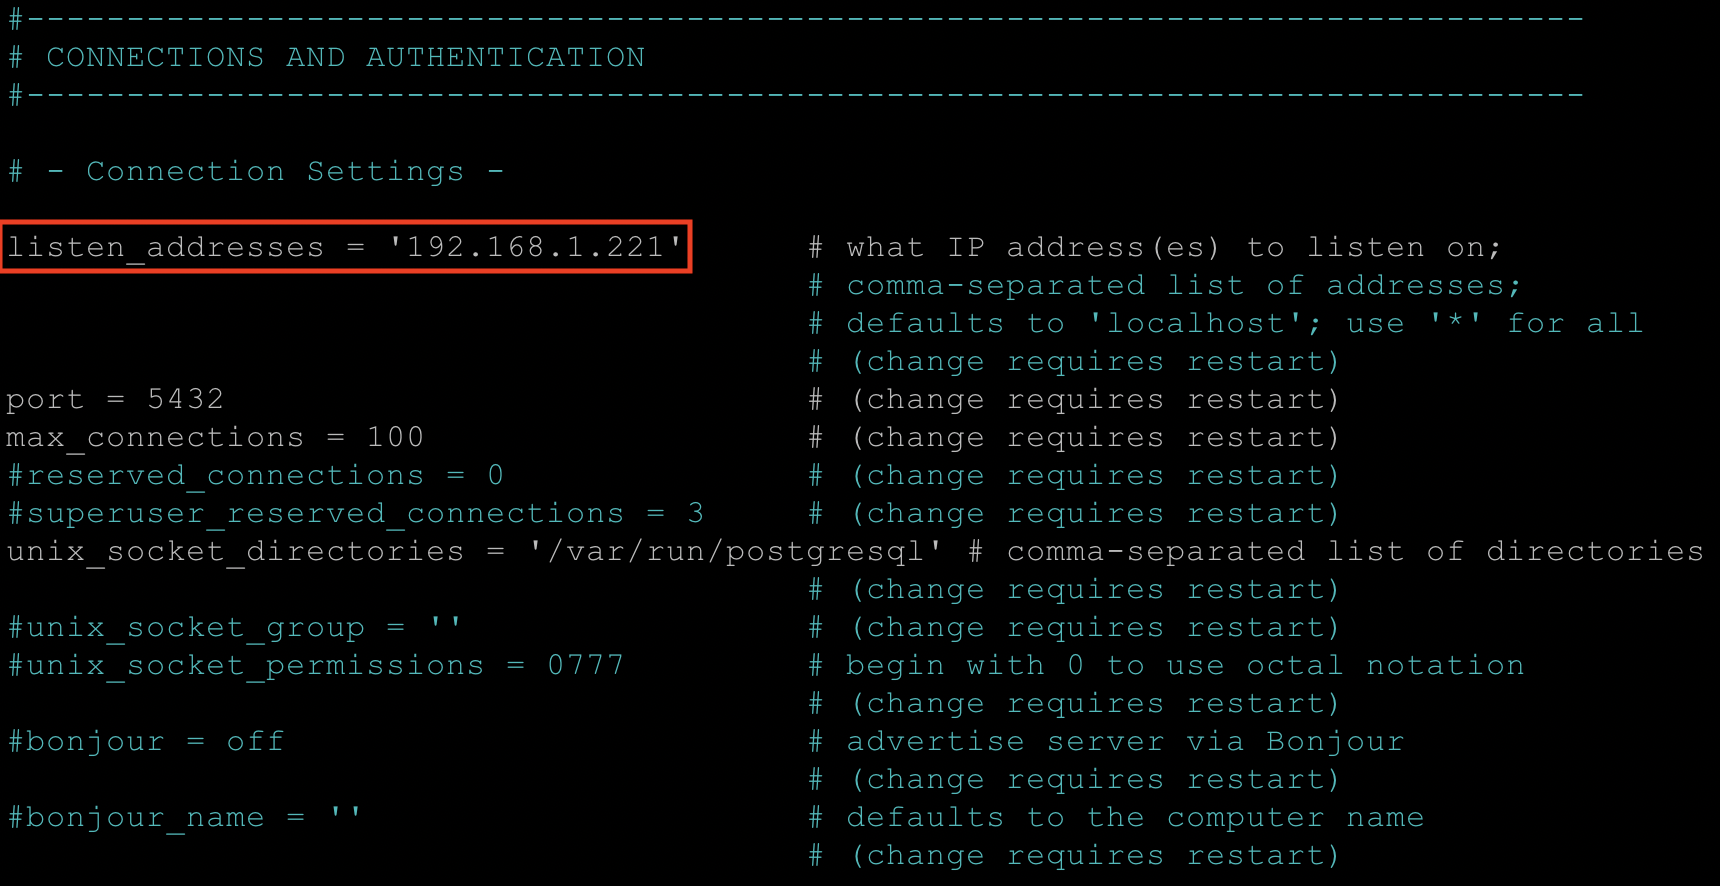
After restarting PostgreSQL, verify that PostgreSQL is listening on port 5432 through the configured IP address:
sudo ss -nlt | grep 5432
Step 12: Configure Client Authentication (pg_hba.conf)
To allow remote connections and specify authentication methods, you need to modify the /etc/postgresql/17/main/pg_hba.conf file.
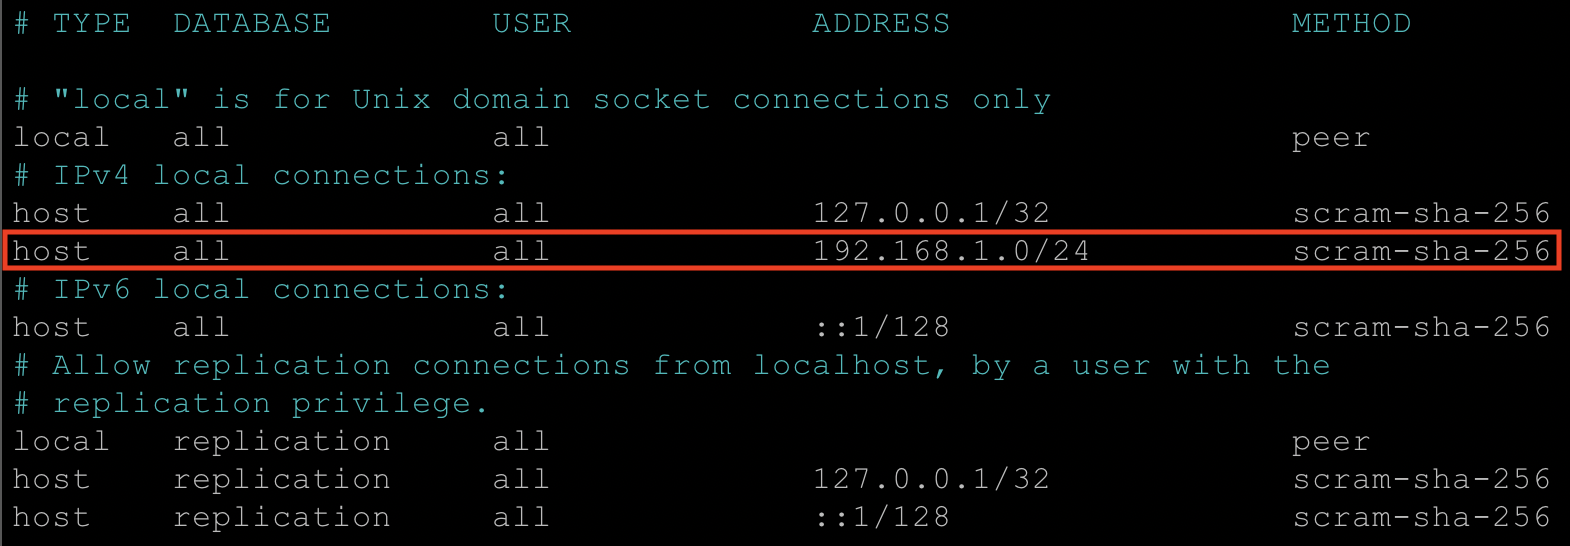
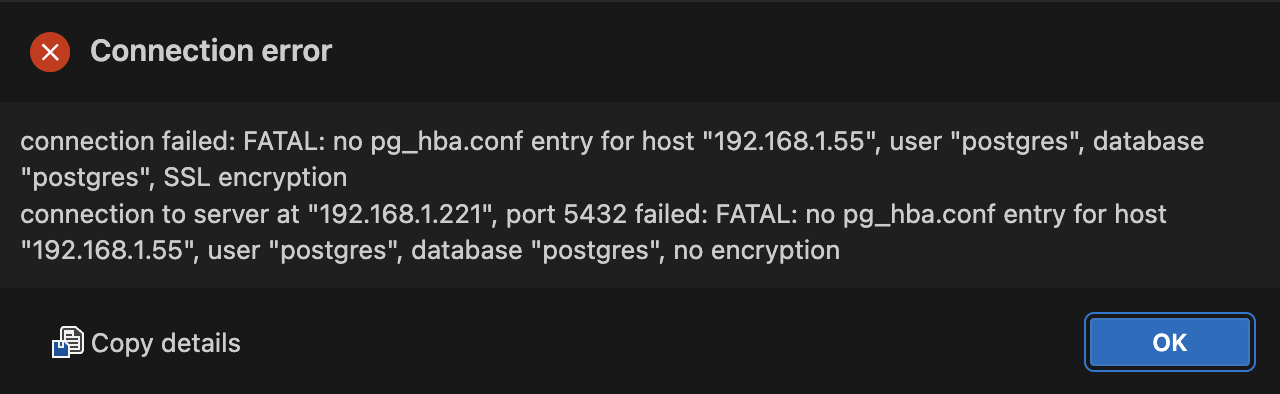
In this configuration, I will allow any user from any host in the 192.168.1.0/24 subnet to connect to any database on this PostgreSQL installation. If you forget to make this change, you will get an error message like the following when you trying to connect. I’m using here Azure Data Studio with the PostgreSQL extension:
Restart PostgreSQL to apply the changes:
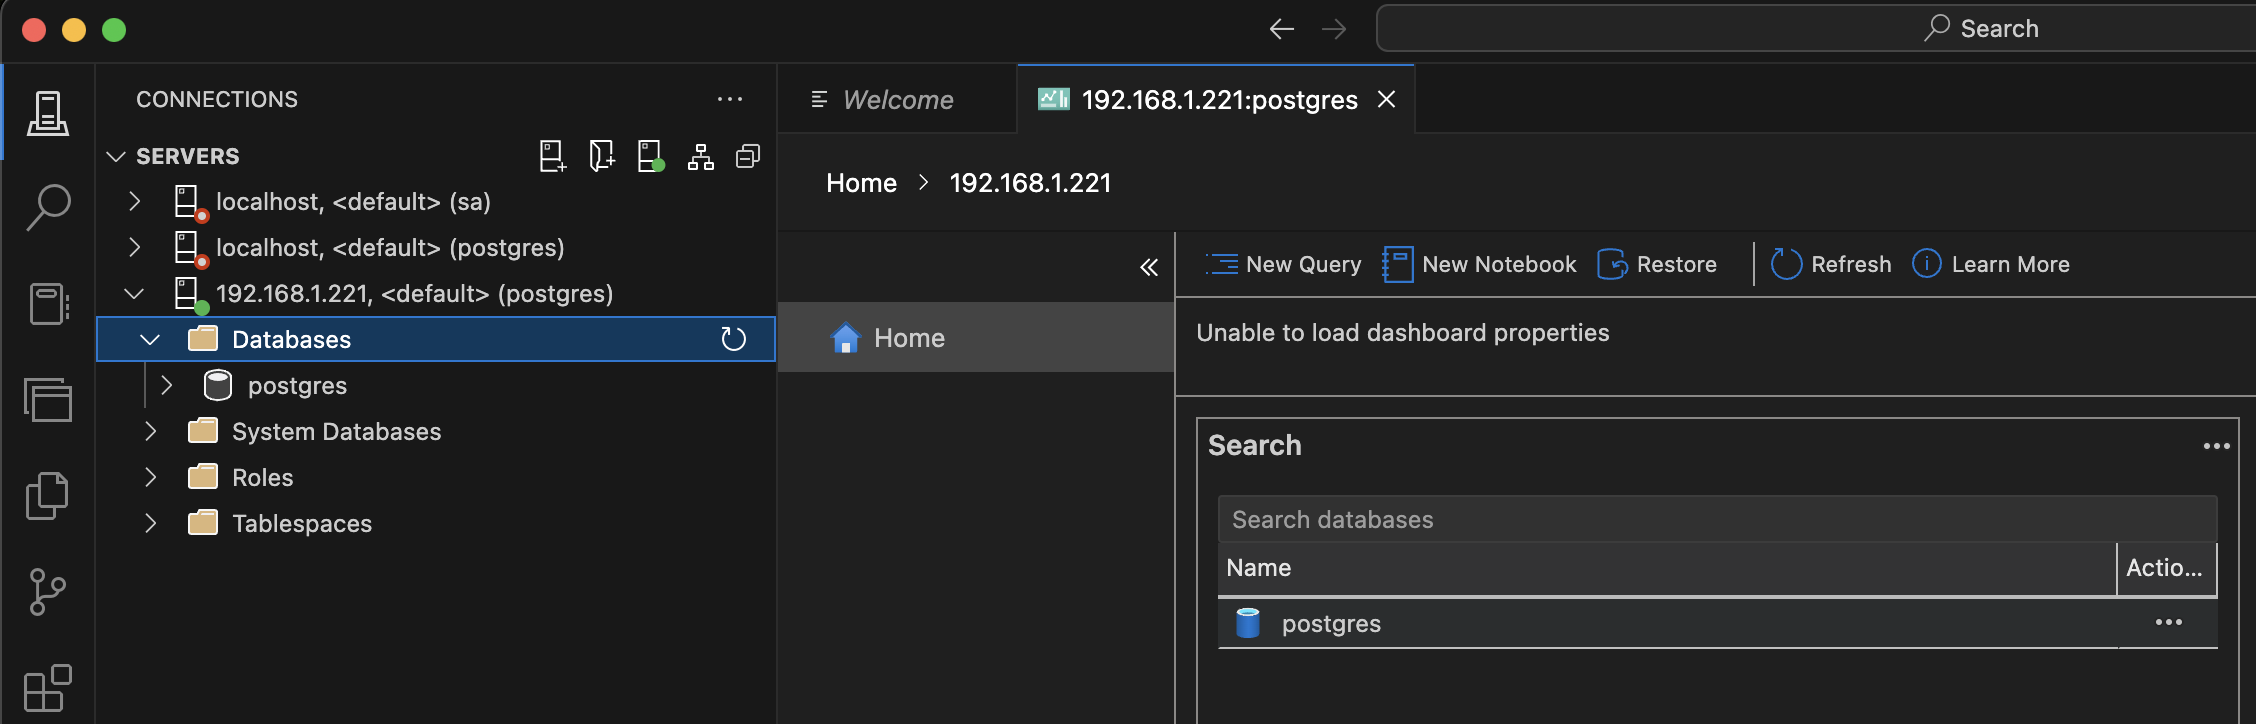
sudo systemctl restart postgresqlIf you try to connect again, the connection should now succeed.
Summary
By following these steps, you’ve successfully installed and configured PostgreSQL 17 on Ubuntu 24.04, set up a custom data directory, enabled network access, and configured client authentication. PostgreSQL is now ready for remote connections, and you can start using it for your projects!
This guide covers the basics, but PostgreSQL offers extensive configuration options for performance tuning, security, and backup strategies. Keep exploring its powerful features to make the most of your PostgreSQL deployment.
Thanks for your time,
-Klaus
2 thoughts on “Comprehensive Guide: Setting Up PostgreSQL 17 on Ubuntu 24.04”
This was very helpful, I was able to follow through to the end.
Is there a reason for setting up custom directories in the path, /postgres/pgdata versus using the default path?
Hello,
Thanks for your comment.
On SQL Server it is a best-practice to isolate the database related files from the OS installation. Therefore, I have put the $PGDATA folder in this setup also on a different vmdk file.
In this way, I can put the vmdk file on a faster storage subsystem, without affecting the OS files.
Thanks,
-Klaus